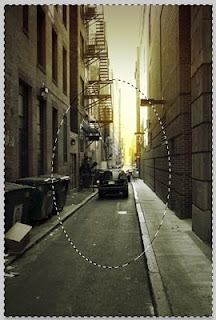
This effect can be done in camera and is quite fun. If you didn't do it in camera, fear not, we have Photoshop. This works in all versions.
Choose the eliptical marquee tool from the toolbox.
Make a selection on the photo, as shown.
Tip: Hold the space bar to reposition the selection as you are drawing it.
_______________________________
Now, it's important to feather the selection. If you don't the effect will be too harsh and obvious. The feather creates a soft edge and a smooth transition to the blurred areas.
Select>Modify>Feather (Photoshop CS3 and CS4 / before that it was Select>Feather)
Depending on the resolution you will change the size of the feather. This was low res so I used 15.
_______________________________
 Right now you have a selection around the center of the image. We want to select everything BUT the center.
 You should see the selection go around the edge of your page now
_______________________________
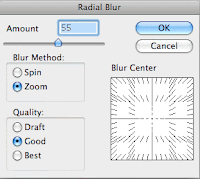
 This is where the effect happens. Choose Filter>Blur>Radial Blur
Choose Zoom as the method
Select Good for quality (Best takes forever with little improvement in quality) Choose your amount to suit. For a heavier blur use 100. You might have to test it and undo a few times to get exactly what looks best on your image. In this case I used 55.
_______________________________
The final result


 Posted in:


0 commentaires:
Post a Comment