simulate an x-ray image in Photoshop can be interresting some times...
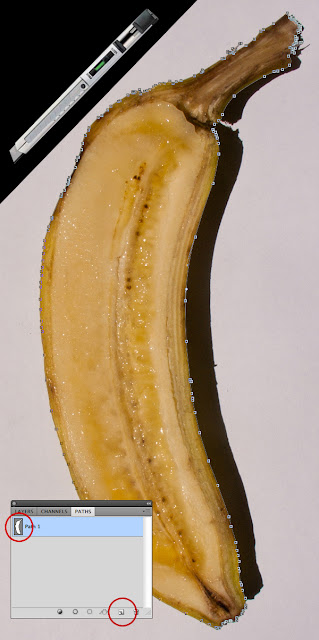
 Take a banana and cut it in half with a very sharp blade and take a photo of it over a white piece of paper.
 Go to the Layers window and select your Background layer, press Command/Ctrl + J to make a new layer out of the selection and make a new black layer between the background and your Layer 1.
Select Layer 1 and press Ctrl/ Command + I to invert it . Go to the channels window and drag the green channel to the "Create new channel" button at the bottom of the window to duplicate it. With the new Green Copy channel selected press Ctrl/Command + L to adjust the levels and enter the settings of the following image. Press OK.
Ctrl/Command + Click on the thumbnail of the Green Copy channel to make a selection out of it. Select the RGB channel again and go to the layers window.
Select Layer 1 and press Command/Ctrl + J to make a new layer out of the selection, this will make a new layer named Layer 2. Select Layer 1 again, turn the fill to 16% and in the menu go to Filters > Blur > Gaussian Blurr, insert Radius: 3. Press OK.
With the Pen Tool, create 4 shapes, double click each one of them and guided by the image below, apply a Color Overlay and Inner Glow. Place the shape layers one over the other and make a group, Rename the Group to "Spine."
Select the Spine group, duplicate, rotate, reposition and distort it to make the complete Spine. In my case I did it 38 times. (Command/Ctrl + T and press Command/Ctrl to distort). Now select the 38 copies and Group them pressing Command/Ctrl + G. Rename the group "Spine Full."
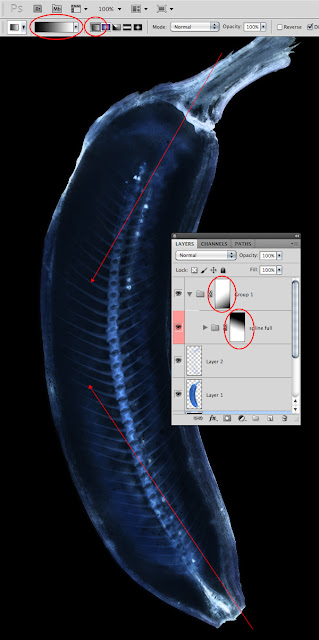
 With the "Spine Full" group selected, click on the Add Layer Mask button at the bottom of the Layers window. Make sure that the thumbnail of the layer mask of the "Spine Full" group is selected. Select the Gradient Tool (G). Your gradient at the top left corner of the screen should be from Black to White, and Linear Gradient selected. Now click and drag from top right to bottom left. This will add some transparency to the top of the spine and blend it with the banana.
Now we will do the same thing to the bottom of the Spine. With the "Spine Full" group selected, press (Command/Ctrl + G) to place it inside a new group. Click on the Add Layer Mask button at the bottom of the Layers window. Make sure that the thumbnail of the layer mask of the "Group 1" group is selected. Select the Gradient Tool (G). And now click and drag from bottom right to top left.
Now we are going to make the final color and contrast adjustments. Press the "Create new fill or adjustment layer" button at the bottom of the layers window and select "Hue / Saturation." In the Hue/Saturation window, enter the values of the following image.
Press the "Create new fill or adjustment later" button again at the bottom of the Layers window, but now select "Levels." In the Levels window enter the values of the following image
Final resulst :


 Posted in:


0 commentaires:
Post a Comment